Plugin Installation
Starter Sites – Free Version
There are three different ways to install the free plugin.
Option 1 – if you already have the Acai theme active
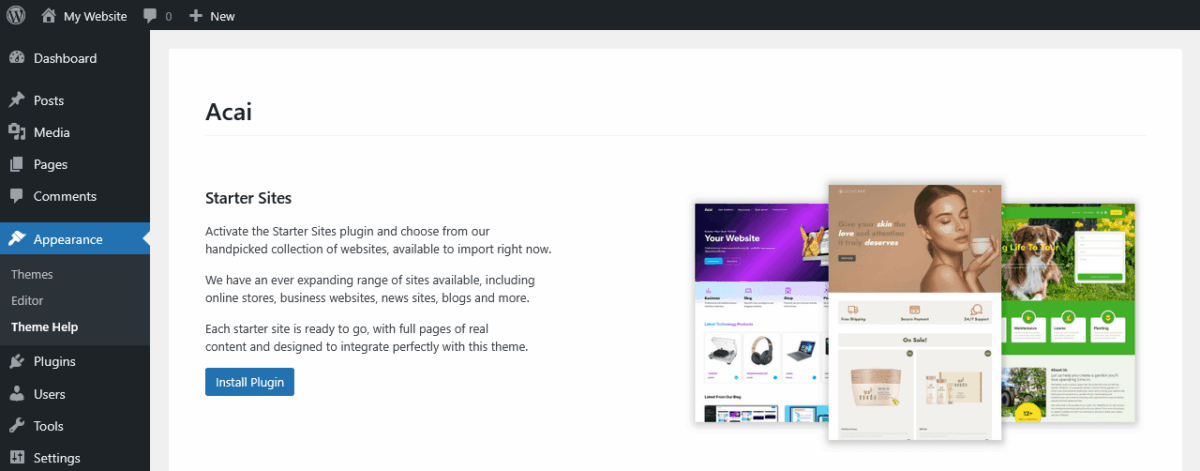
If the Acai theme (or an Acai child theme) is already the active theme on your website, the Starter Sites plugin can be installed and activated with one click from the Acai theme (or child theme) help page.
Navigate to Appearance > Theme Help and click the Install Plugin button which can be found below the Starter Sites sub-heading and description. The plugin will install from the wordpress.org plugin directory, and will be activated at the same time.
Option 2 – direct from the wordpress.org plugin directory
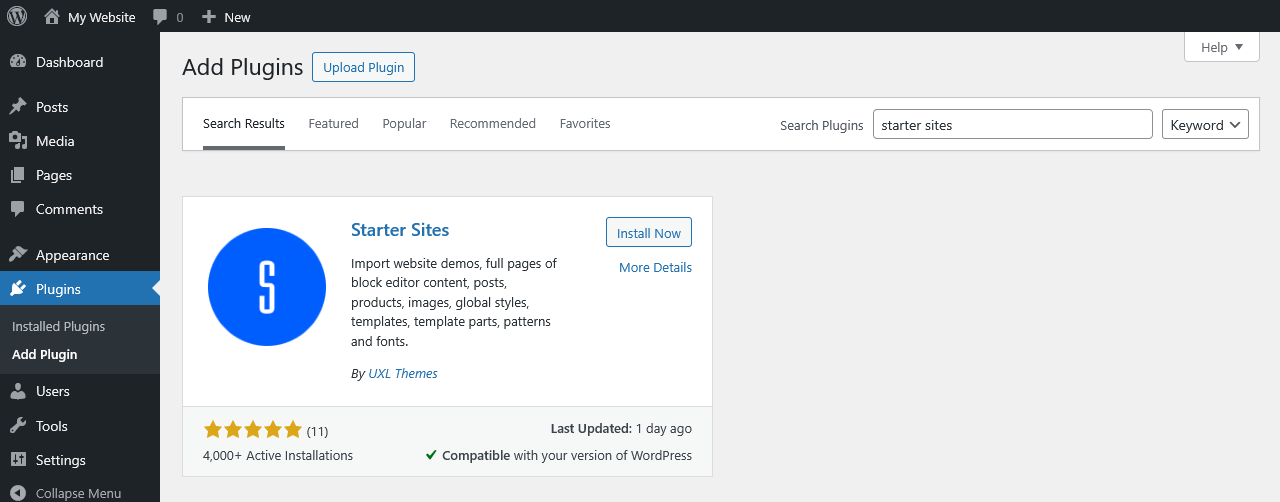
In your WordPress dashboard, navigate to Plugins > Add Plugin and search by keyword by typing starter sites into the search form.
Locate the Starter Sites plugin and click the Install Now button.
Option 3 – upload the plugin manually
You can also download and save the plugin to your computer, and install from the plugin’s .zip file via the Upload Plugin button.
Activate the Plugin
The Starter Sites plugin will now begin installing. When the installation has completed, hit the Activate button.
This activation step is not needed if installing the plugin from within the Acai theme page in option 1.
Starter Sites Pro
The pro version is available to download in the “Downloads” tab of your account here.
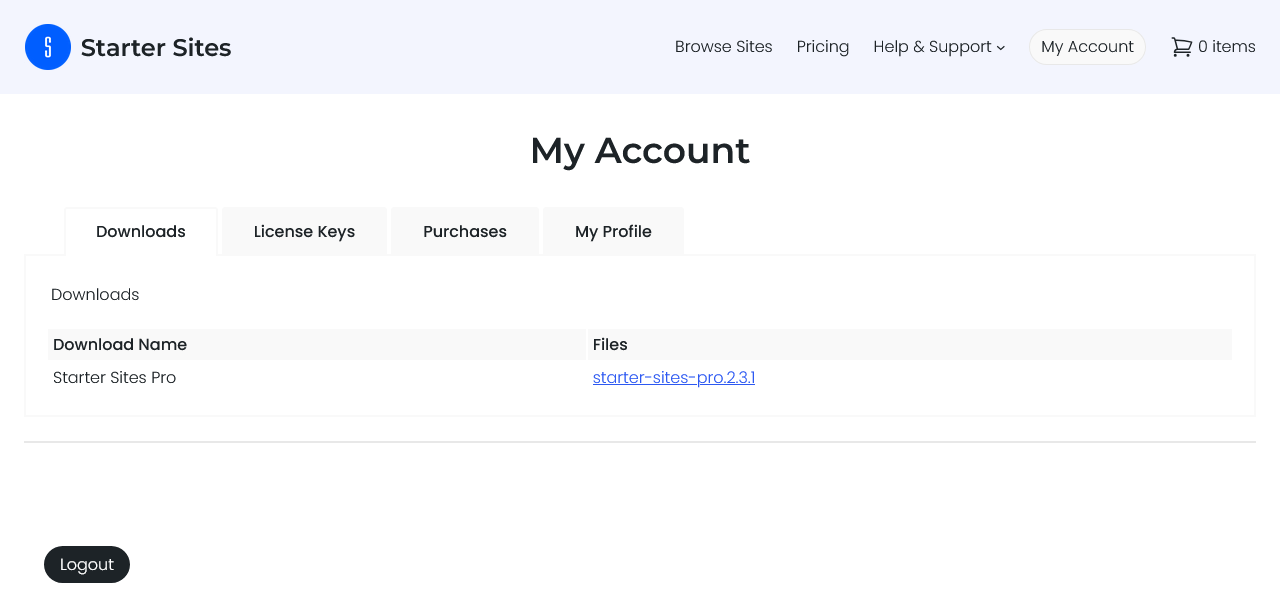
Download the plugin file from your account and save to your computer.
In your website’s dashboard, navigate to Plugins > Add Plugin and click the Upload Plugin button.
Click either ‘choose file’ or ‘browse’ (depending on your browser), select the starter sites pro .zip file that you have already saved to your computer, and click the Install Now button.
Activate the Pro Plugin
The Starter Sites Pro plugin will now install and should only take a couple of seconds to complete. When the installation has finished, click the Activate button to use the plugin right away.
Activating Your Pro License Key
To get access to all the premium starter sites, you should activate your license key on every website where you are using the Starter Sites Pro plugin. There are no limits on the number of sites, so you can use Starter Sites Pro on as many WordPress sites as you wish.
Your license key is available in the “License Keys” tab of your account here.
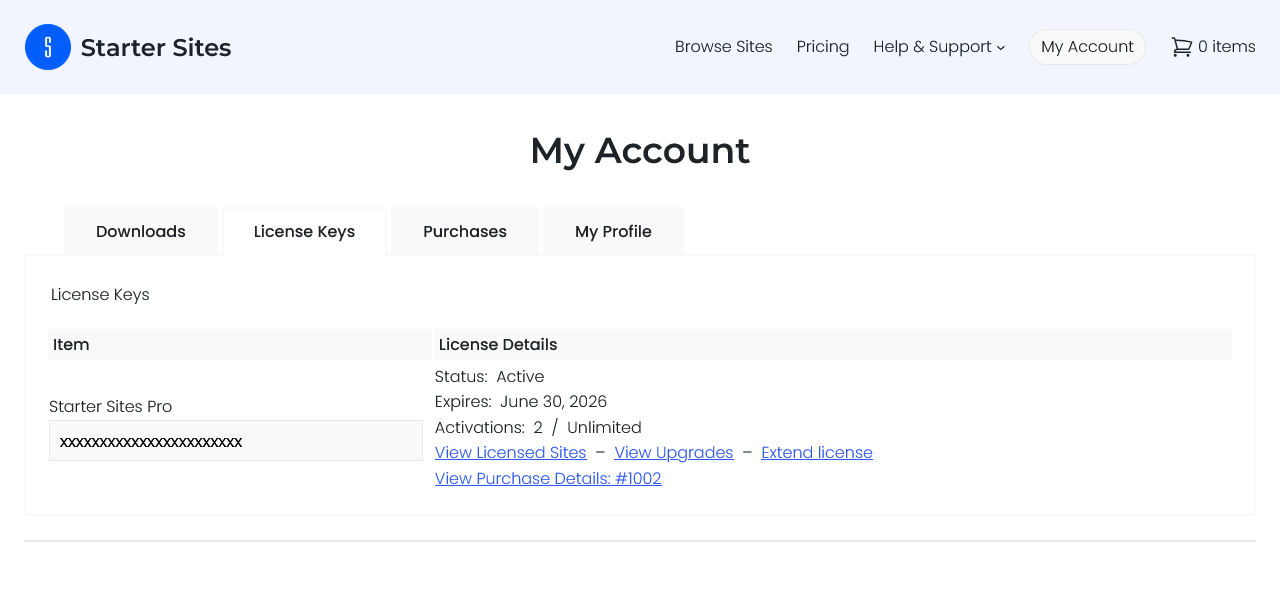
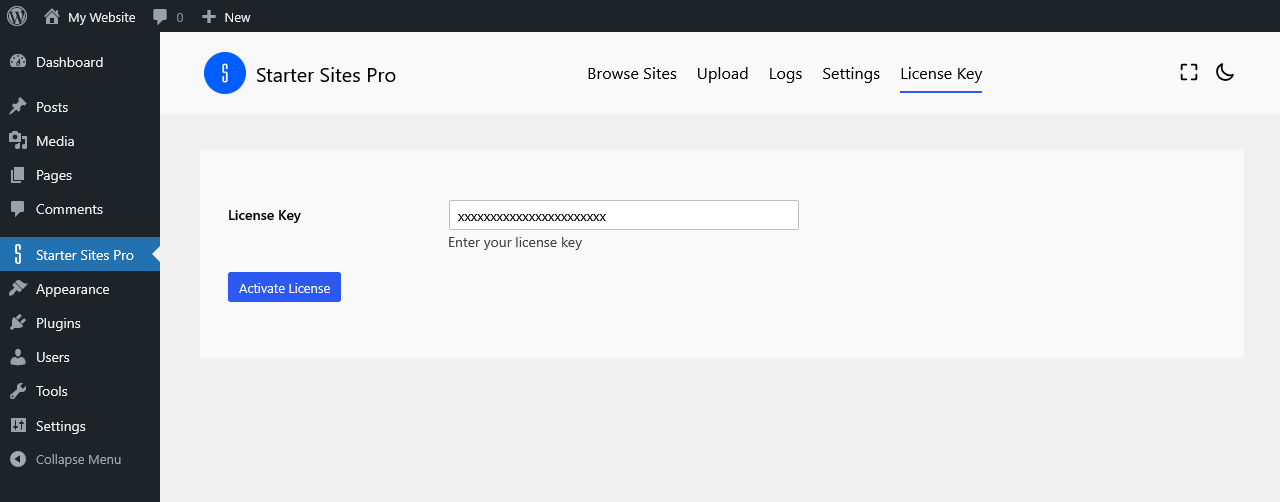
Copy your license key and head over to your the dashboard of your own site. Navigate to Starter Sites, open the License Key tab, enter or paste your license key into the text box and click the Activate License button.
That’s it, you now have immediate access to all of the premium starter sites.
Using the Plugin
Browse Sites
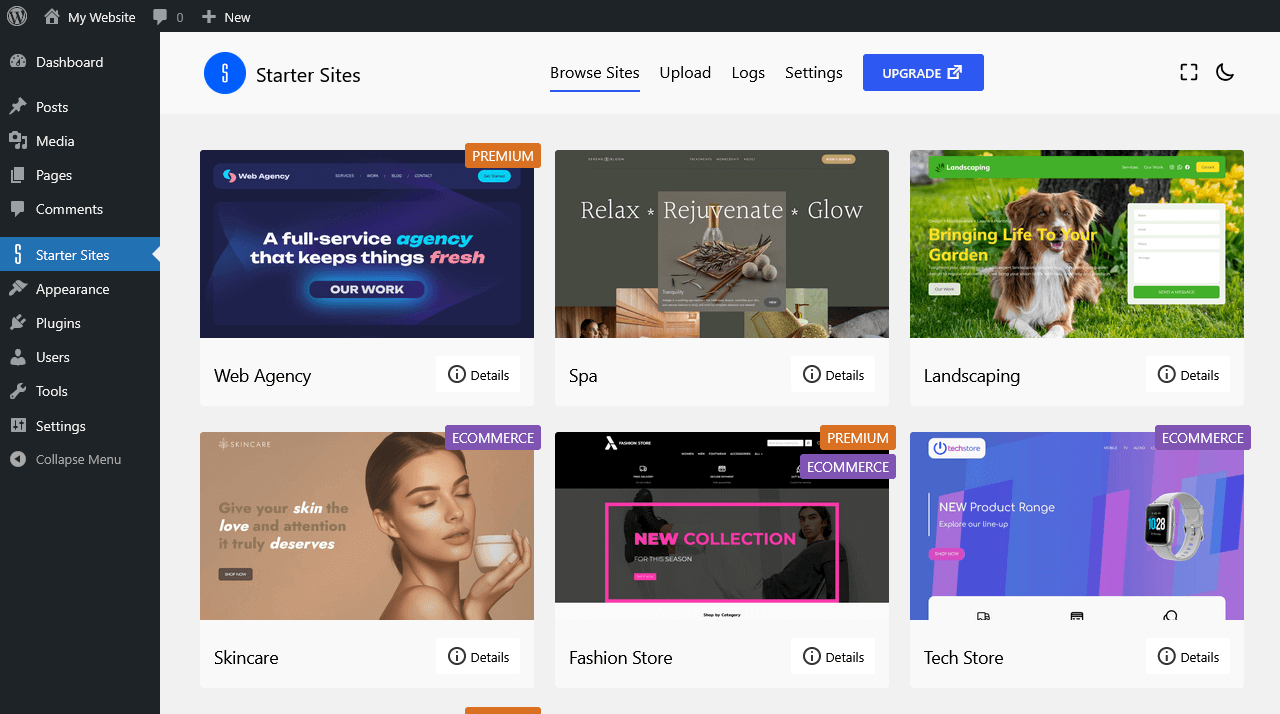
The plugin is now ready to use and you can browse the available Starter Sites and select a website to import.
The main plugin page is located in your dashboard at > Starter Sites.
View Site Details
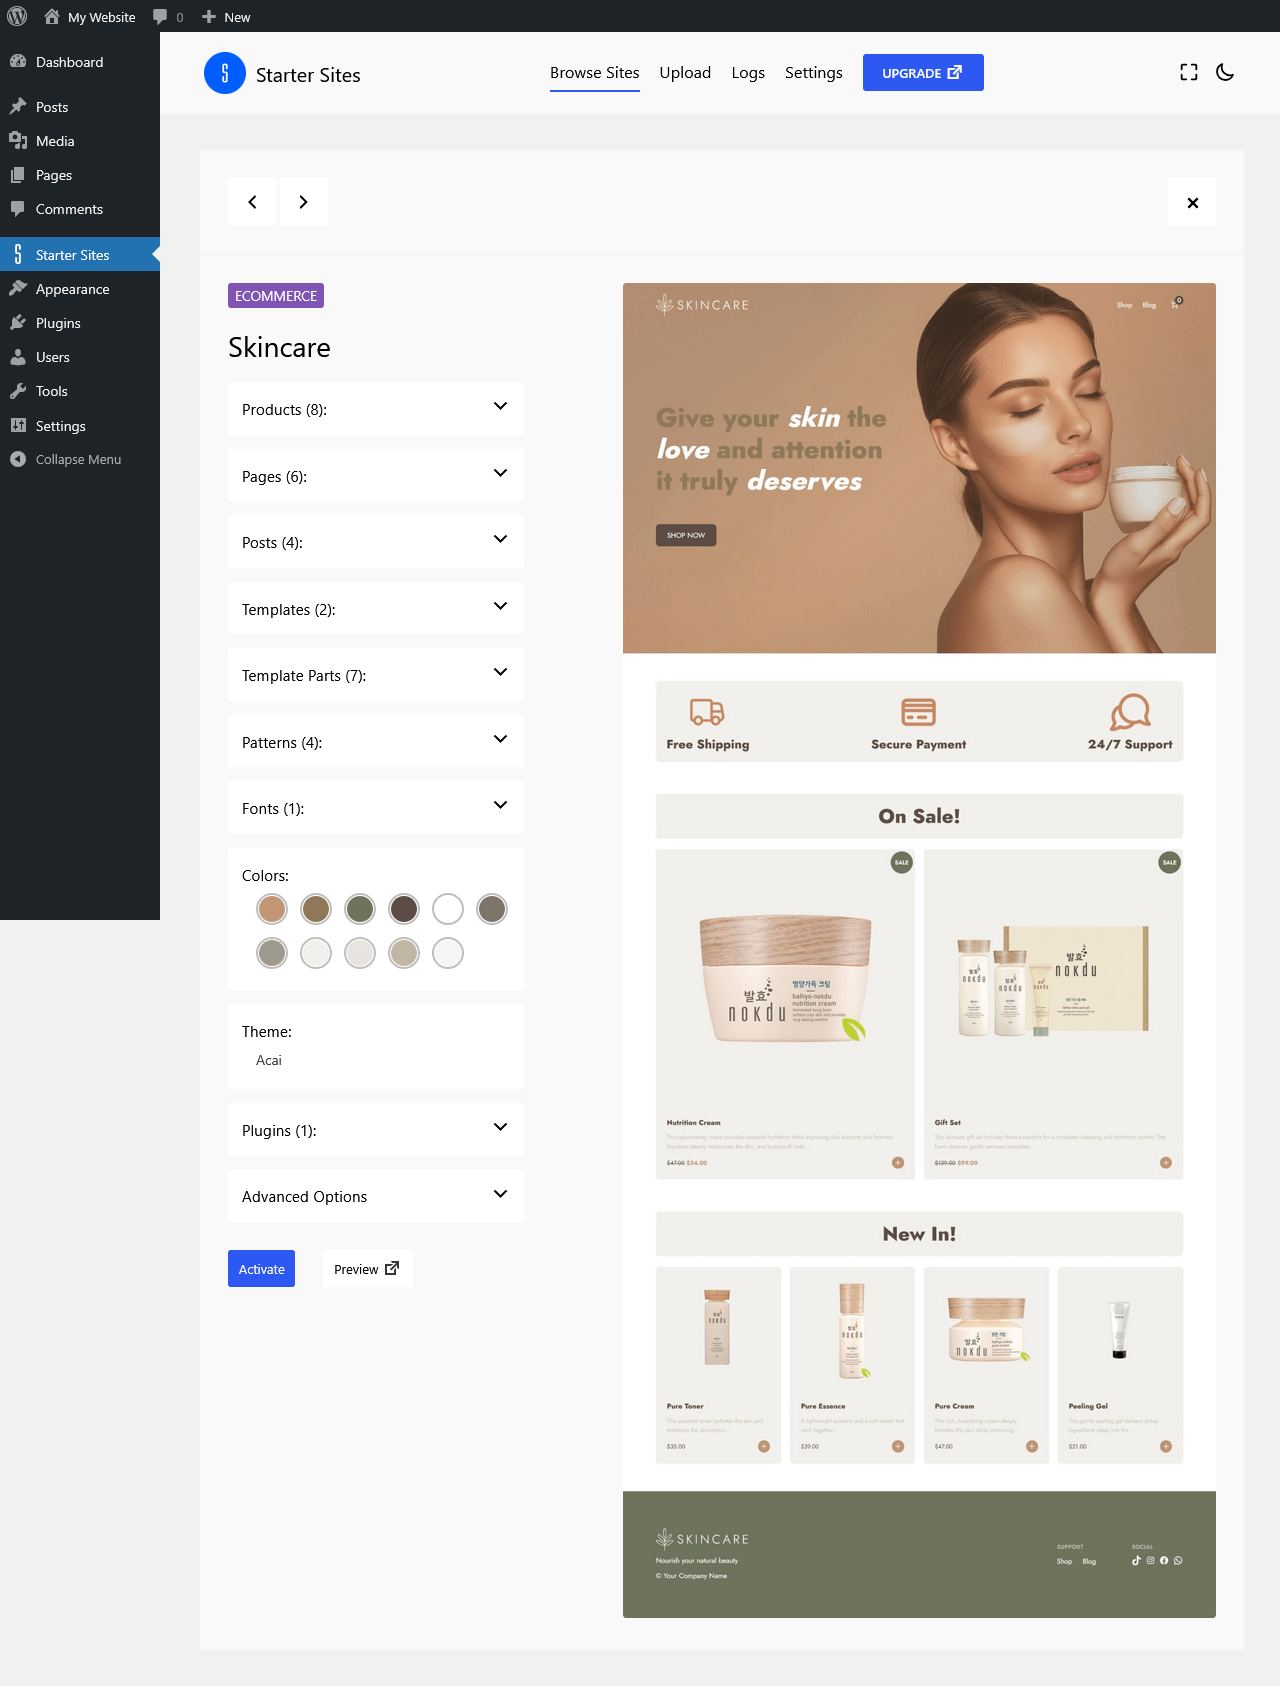
Clicking the Details button brings up more information about each Starter Site, where you can view details about the content including pages, posts, products, page templates, template parts such as header and footer, and hand-crafted patterns that are included with the starter site.
The color palette and fonts used are also listed here, along with the theme and any plugins that are required.
The left/right arrows allow you to move between sites while still in the view details panel, and clicking the “x” button will close the details panel to display the sites in grid layout view.
Importing a Site
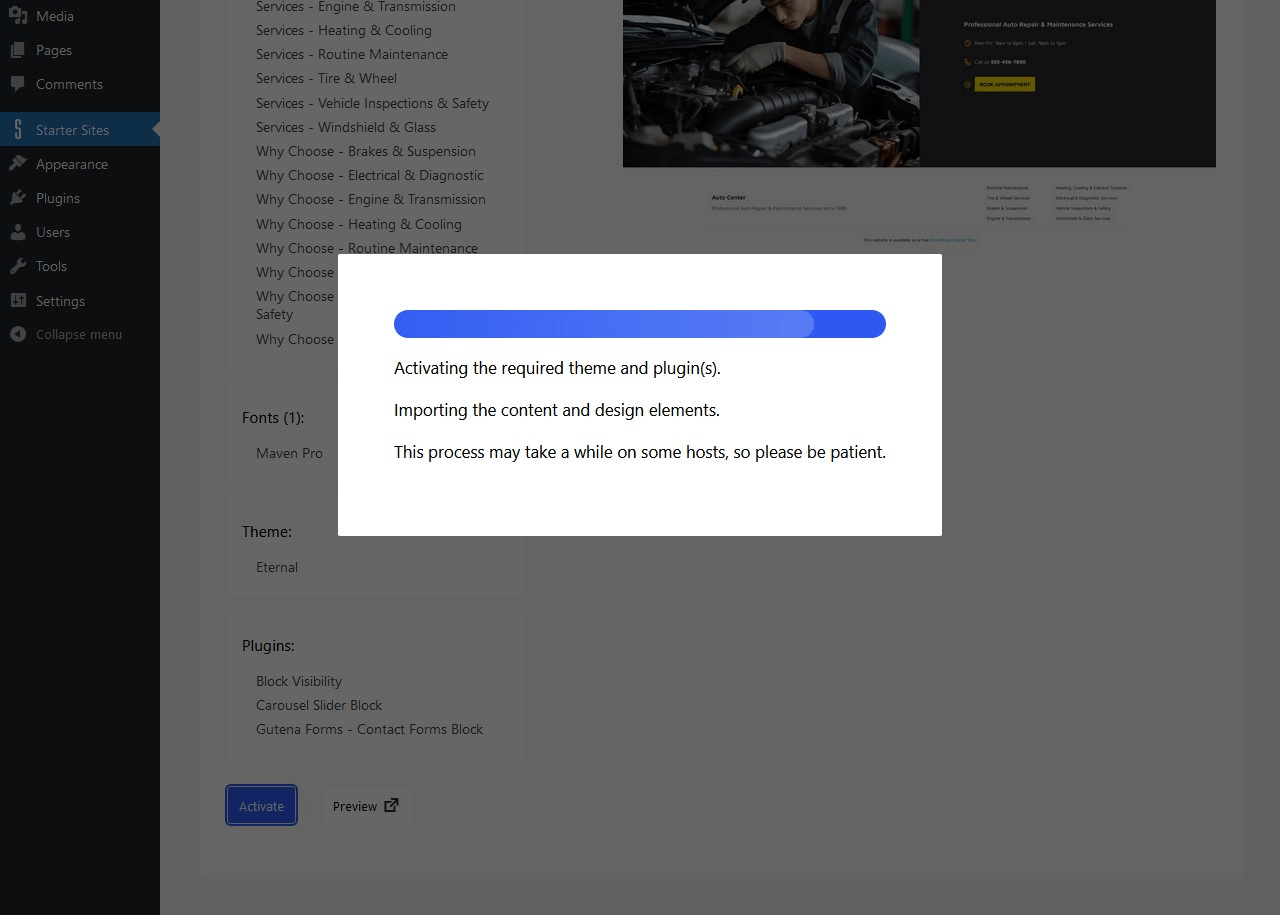
To import a site that you like, click the Activate button, and the process of importing the content and styling into your website will begin. The required theme and plugins will also be installed and/or activated as needed.
Advanced Options in Starter Sites Pro
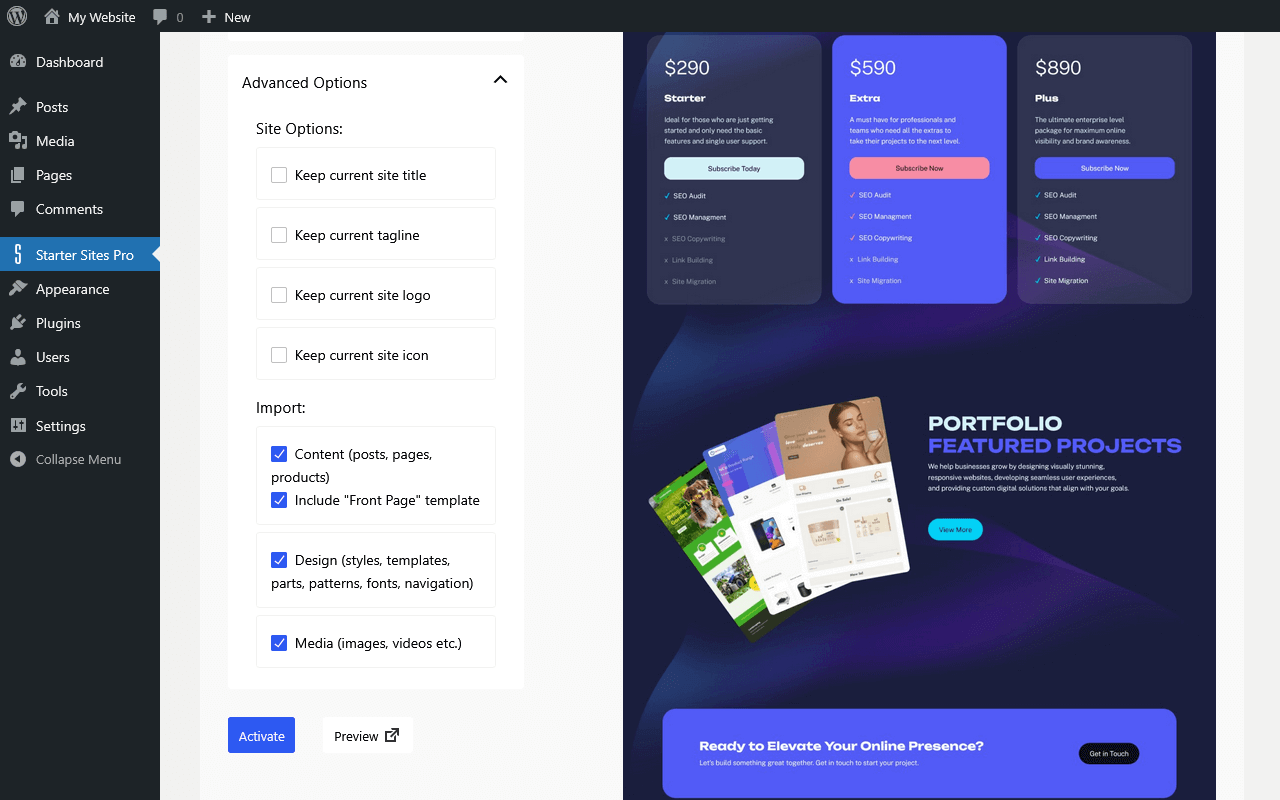
With the Starter Sites Pro plugin there are advanced site import options that you take advantage of.
Site Options
By default the site title, site tagline, site logo and site icon of the selected starter site are imported. If you don’t want these to be imported, you can check the relevant box next to each option to keep the original setting(s) of your website.
Import Options
By default the content (pages, posts, products) of the selected starter site are imported. If you don’t want to import this content, you can uncheck this option, and the content will not be imported. This option is useful if you know you will be using your own content, and only want to import the starter site design. Patterns are included in the design, so if you want to create your pages for yourself, the listed patterns will still be available if you wish to use them when creating your pages.
A special note about the front page template: in some starter sites the front page content will be in the template, so there is an option to include the front page template with the general content import, even if you choose not to import the design which would normally include the front page template.
By default the design (styles, colors, fonts, templates, template parts, patterns, navigation menus) of the selected starter site are imported. If you don’t want to import the design, you can uncheck this option, and the design will not be imported.
By default the media (images, videos etc.) of the selected starter site are imported. If you don’t want to import the starter site’s images, you can uncheck this option, and the images will not be imported to your site. Should you choose not to import images, they will still be visible in the content of your site (assuming you have also imported the site content), but they will render from their location in our demo/preview site. This option is useful if you know you want to replace the starter site images with your own, and do not want to have the images uploaded to your own website. This saves time in having to delete the imported images later on.
Upload a Site
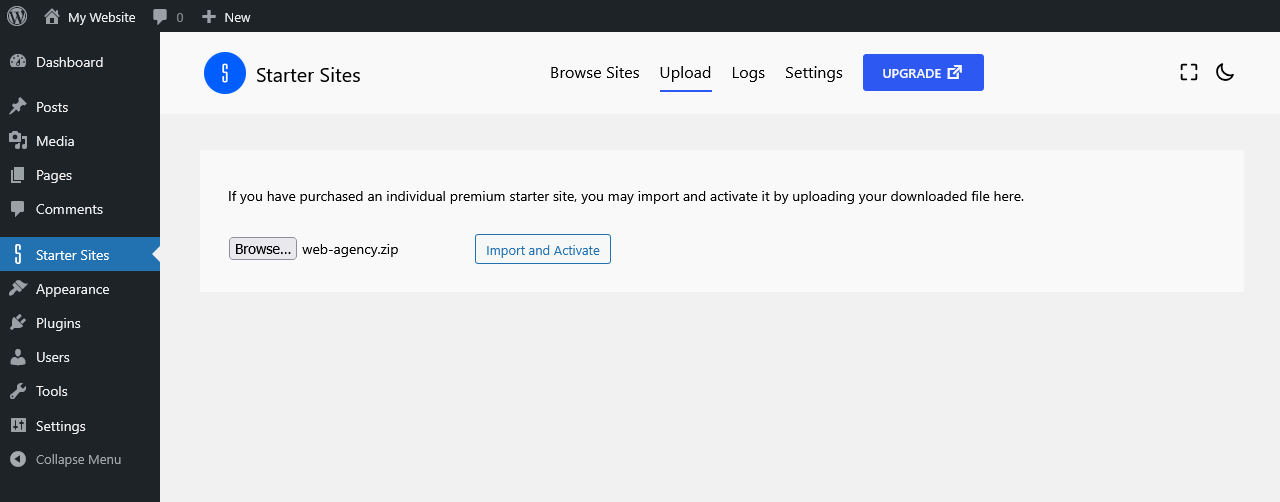
If you have purchased an individual premium starter site, you can upload and activate it using either Starter Sites (free version) or Starter Sites Pro. You don’t need to purchase the full pro plugin to import a premium starter site that you have purchased individually.
Your purchased premium site is available to download from your account here. Download and save the site’s .zip file to your computer.
To upload and activate the site, click the Upload tab, click either ‘choose file’ or ‘browse’ (depending on your browser), and click the Import and Activate button.
Activation Process
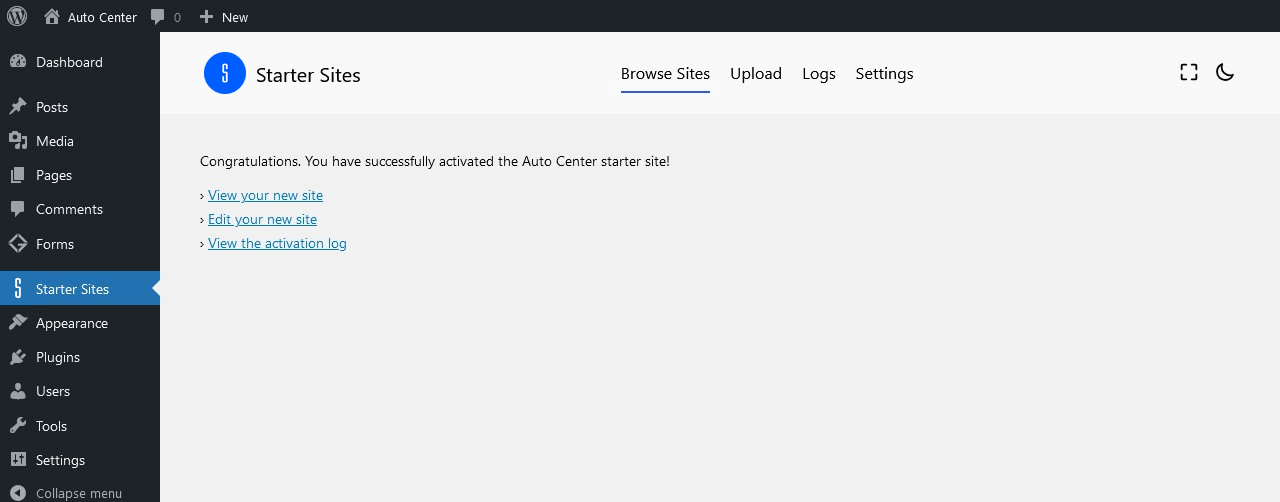
The process can take anywhere from a few seconds to a couple of minutes (depending on your web hosting), and when the import has finished there are quick links to view your new website, make changes or tweaks in the site editor, or view the activation log which shows detailed information about the imported starter site.
Activation Log
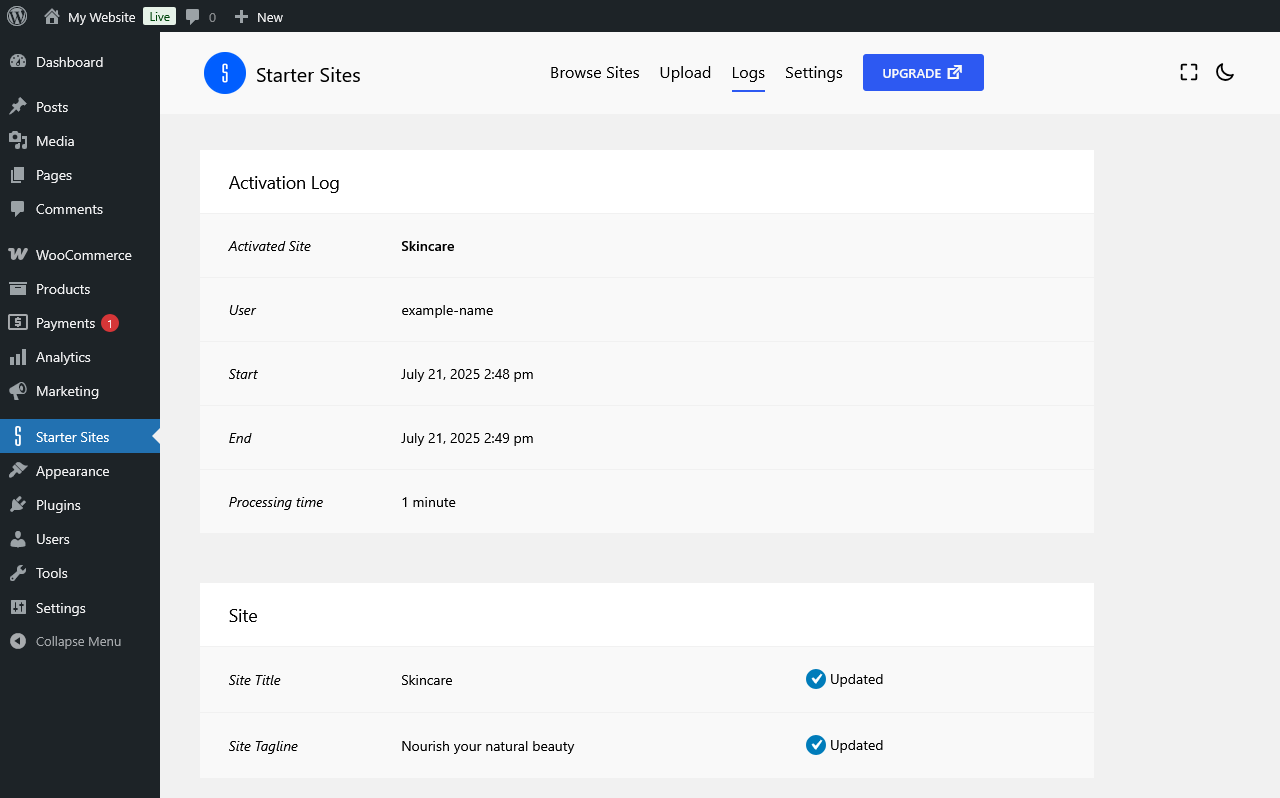
After importing a starter site, the activation log is available to view at any time.
Navigate to the Logs tab to see the log for each site activation.
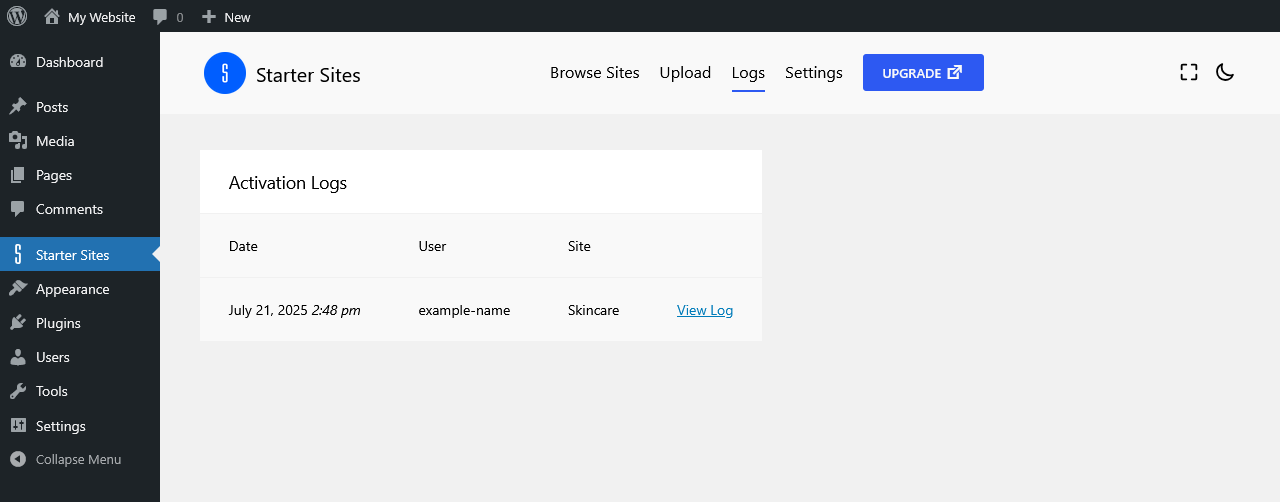
Clicking View Log will display the name of the activated starter site, and the start and finish time of the import-activation process.
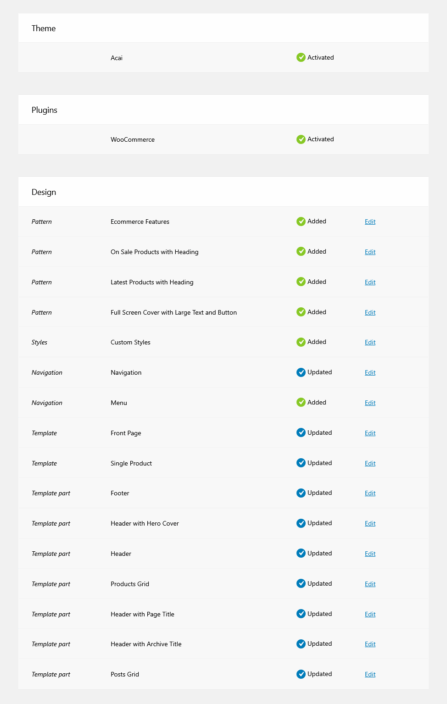
The theme and any plugins are detailed here, along with information about the site design that was imported such as patterns, custom styles, navigation menus, templates, and template parts.
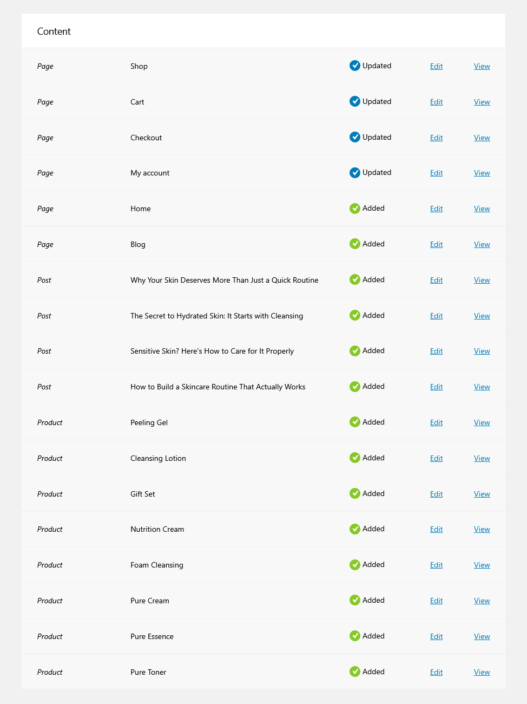
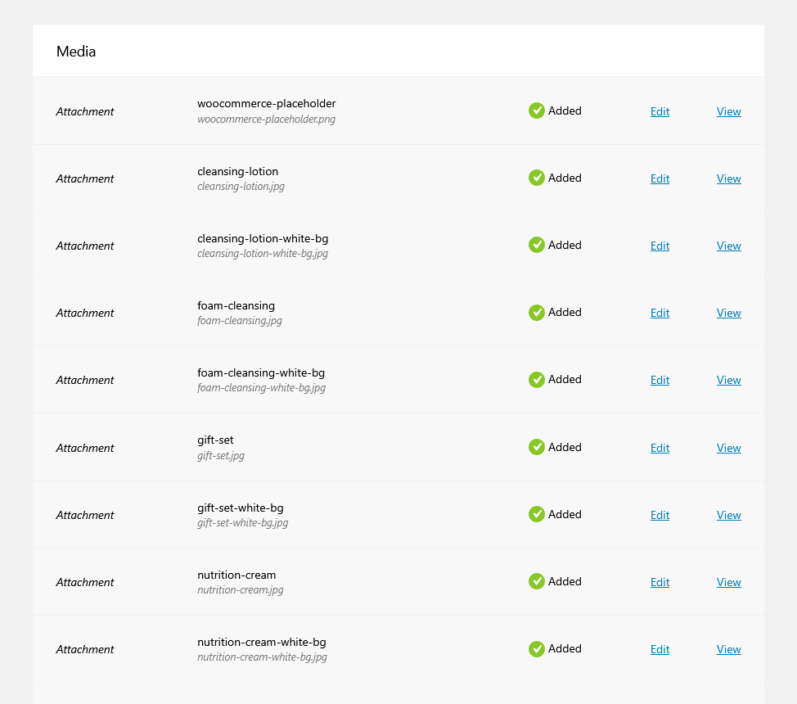
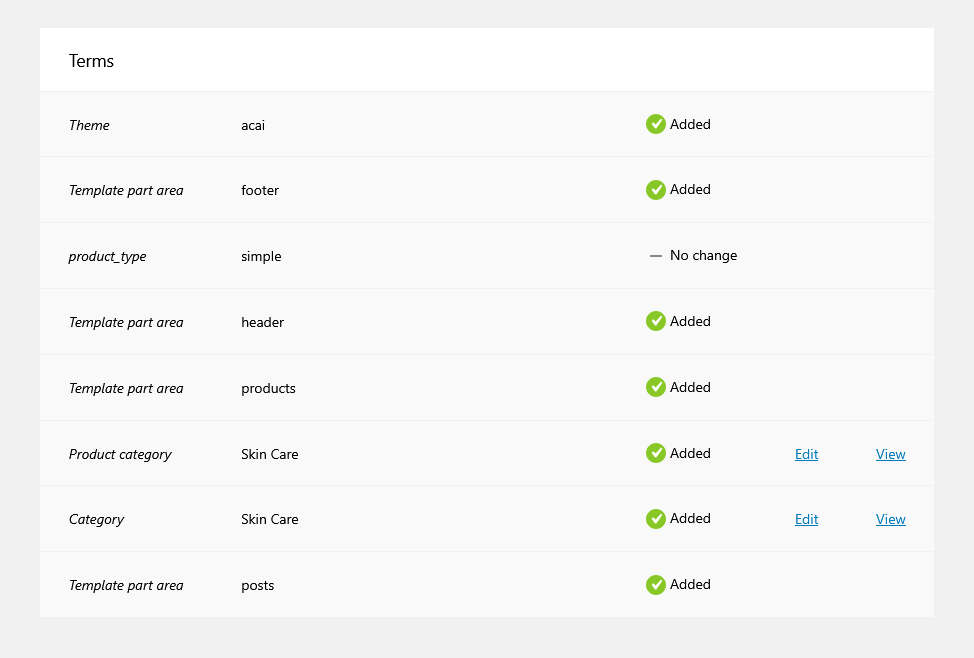
Details of the imported content are also available to view, including pages, posts, products, media attachments such as images, any WordPress terms such as post categories and tags, and product categories and attributes.
Any design element or content that is viewable has a quick “view” link, and also any content or design element that is editable has a quick “edit” link should you wish to edit that element.
Theme, Plugins & Design Elements
Content
Media Attachments
WordPress Terms – Categories, Tags, Product Attributes etc.
Viewing Options
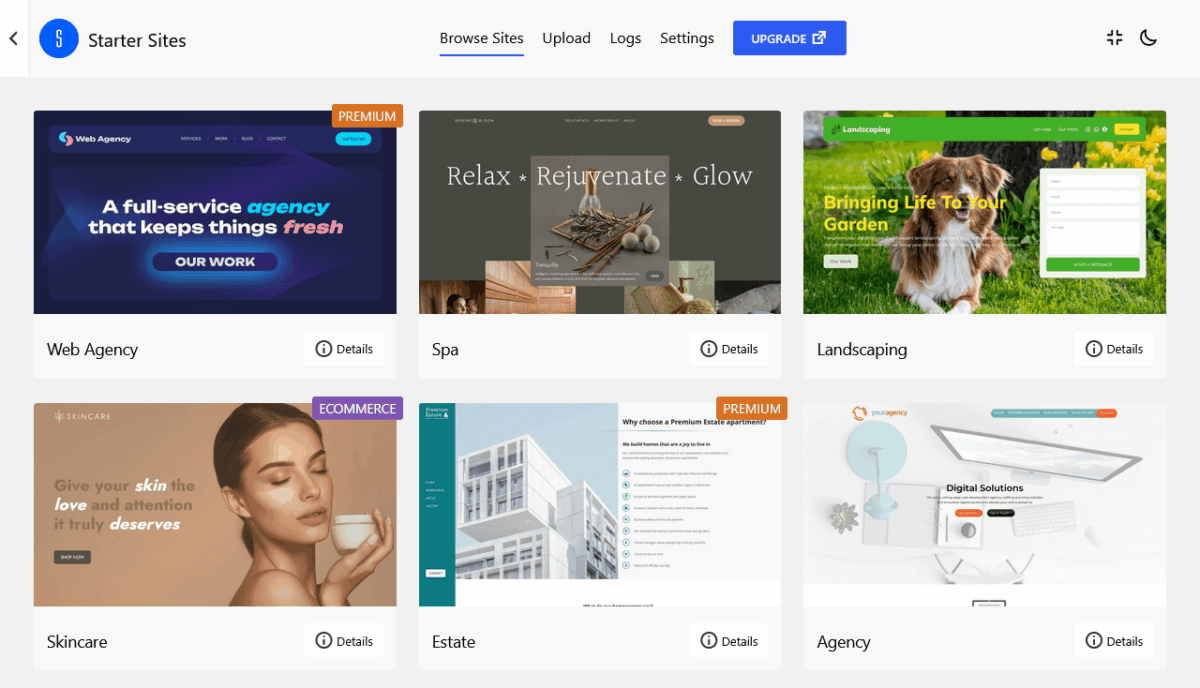
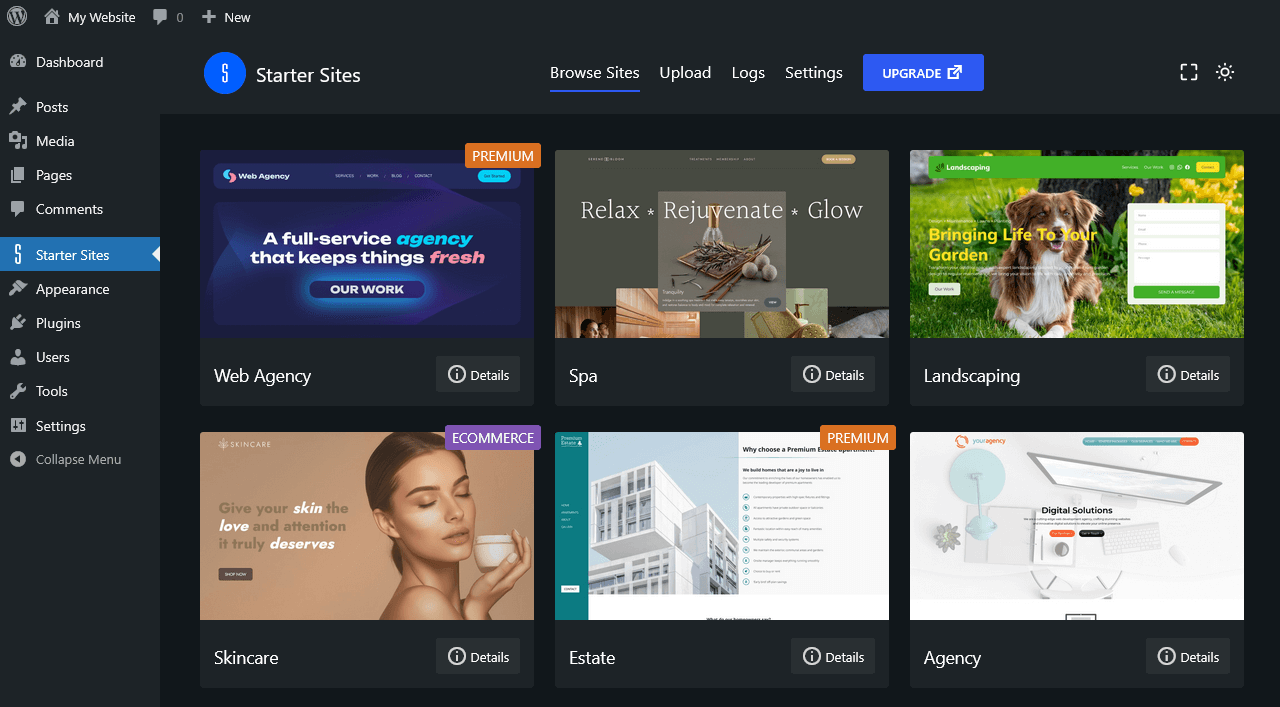
In the main plugin page there are options for viewing the page in full-screen, and also an optional dark mode.
Toggle the “Full Page” icon to switch between the default page view and the full-screen view. In full page view, the top horizontal WordPress admin bar and the admin sidebar are hidden from view, with a quick link button to the left of the Starter Sites icon to take you back to your site dashboard.
Toggle the sun/moon icon to switch between the default light view and the optional dark mode view.
Both options are remembered for the current admin user, so the next time you navigate to the Starter Sites page, you will be viewing the page with your previously selected option(s). Any other admin users will be unaffected by your personal preference.
Full Page View
Dark Mode
Settings
Menu Location
By default the plugin’s menu link in the WordPress dashboard admin sidebar is located just before the Appearance link.
It is possible to change the location to suit your own preference. Select your preferred location and click the Save Changes button. The locations available to select are:
- Before Dashboard
- Before Posts
- Before Media
- Before Pages
- Before Comments
- Before Appearance (the default setting)
- Before Plugins
- Before Users
- Before Tools
- Before Settings
- After Settings
- Sub-item in Appearance
- Sub-item in Tools
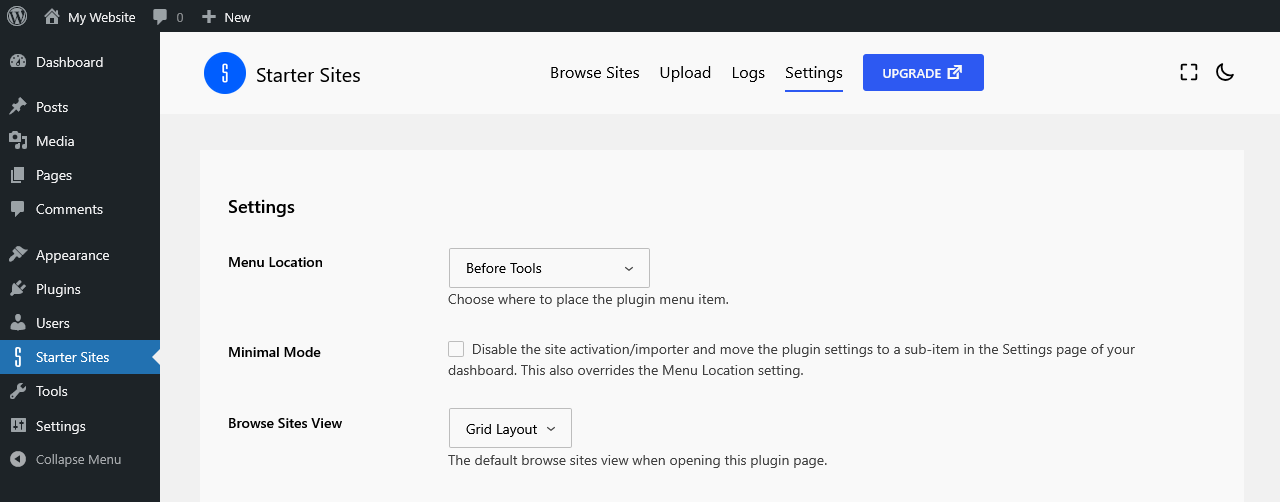
In the screenshot below, the menu location has been changed to “Before Tools”.
Minimal Mode
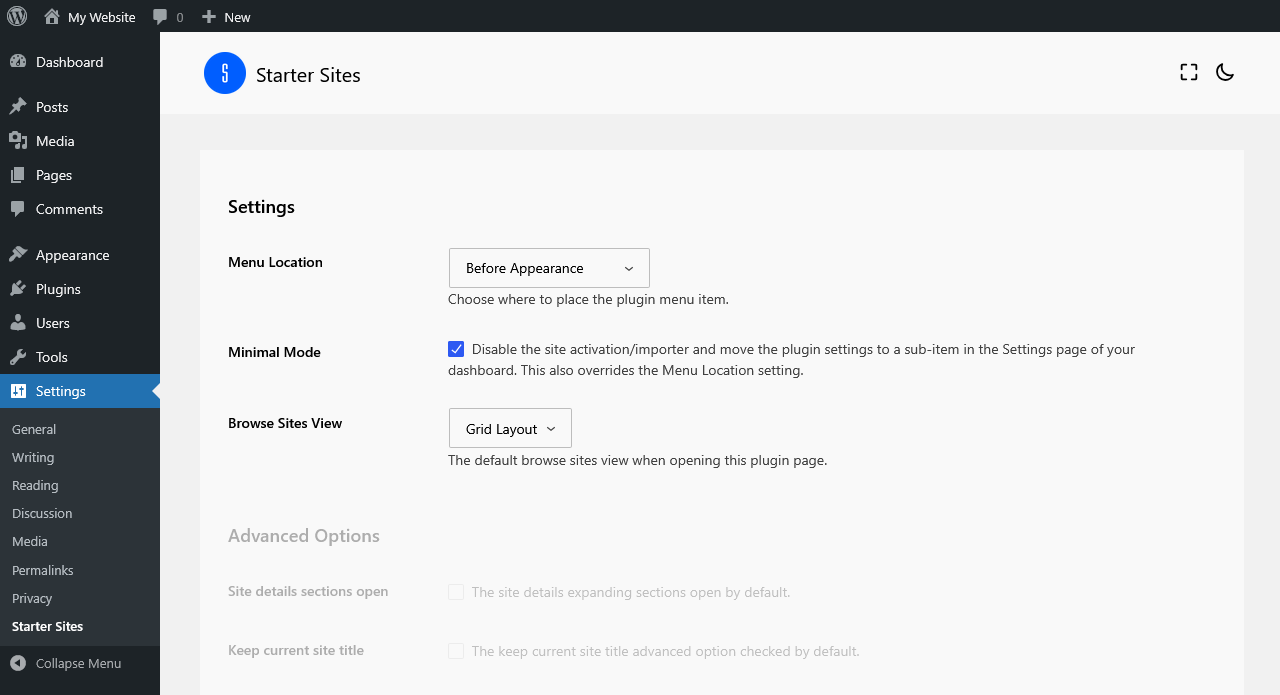
The plugin has an option that lets you put it into minimal mode. With this, the site activation/importer are disabled and only the plugin settings page is available with the plugin settings menu link moved to a sub-item in the Settings page of your dashboard sidebar. This also overrides the Menu Location setting.
To enable this option, check the Minimal Mode box and click the Save Changes button.
You can put the plugin back to full functionality at any time by navigating to Settings > Starter Sites in the admin sidebar, unchecking the “Minimal Mode” option, and clicking the “Save Changes” button.
After importing a starter site, all of the starter site’s customized templates and template parts are available as backup designs that can be re-added to the relevant template or template part at any time.
This is handy if you reset the template or template part back to the theme default, or make other customizations, and you want to re-apply the original imported starter site design to that template or template part.
With the plugin in minimal mode, this backup functionality is still available for your templates and template parts.
The screenshot below shows the plugin settings page when placed in minimal mode.
Browse Sites View
By default, when navigating to the main Starter Sites page, you are presented with the available sites in a grid layout. This can be changed to “Site Details” if you prefer. When this option is selected, the starter sites view will automatically be opened on the site details of the first site in the list. You can then navigate between sites using the left/right arrows, and also click the “x” button to close the individual site details and display the sites in grid layout view.
What is Imported?
When activating a starter site, the content and design elements are imported to your website.
Content
The content consists of posts and pages, and also products if the site is a WooCommerce compatible eCommerce starter site.
If you already have a post/page/product with, for example, the slug about-us and the starter site also has a page with the same slug, your existing page will be updated when importing pages with the Starter Sites plugin.
Some other site import plugins may create a new page with a slug such as about-us-2 and you would then find your site contains multiple “About Us”, “Shop”, or “Checkout” pages etc.
As WordPress saves revisions of your posts, pages and products it is easy to revert back to the original page after importing pages with the Starter Sites plugin, if you wish to do so.
Media
Media attachments such as images and videos.
If you already have an image or video with the same file name in the same upload directory, this will not be replaced with the starter site image. Instead a new image will be created and the newly imported image file name is appended as appropriate.
For example, you already have an image with the file name waterfall.jpg and the starter site also has an image with the same file name.
If your original image is located in a month/year based folder (see Settings > Media in your dashboard) e.g. /uploads/2025/07/waterfall.jpg and you are activating the starter site in July 2025, the newly imported image will be saved as /uploads/2025/07/waterfall-1.jpg leaving your original image intact.
If the month is different, for example the date is August 2025, the newly imported image will be saved as /uploads/2025/08/waterfall.jpg and your original image will still be left intact.
Media attachments such as images do not have revisions in WordPress in the same way as pages or posts, so the Starter Sites plugin will not remove or replace your own images in the Media area of your dashboard.
Design
Custom Styles
The design elements are the site’s styling (referred to as Custom Styles) such as typography settings (fonts, font sizes etc.), colors (color palette, color settings such as background, text, heading, button colors etc.), layout and spacing (content width, site padding and block spacing), and also any default block specific styling.
Templates
For example the page template defines the layout and display of your pages, and the single post template defines the layout and display of your individual blog posts. There may be other templates such as the template for the blog page, the search results page, or if the site is eCommerce the templates for the product categories and single product page.
Template Parts
Template parts are such things as the site header and footer. Some designs may have more than one header or other template part, such as a different header for the front page template, or a sidebar for the blog template.
Navigation
Menus are included in the design and this may include a menu designed for the header and a menu specifically for footer. Some designs may also have different header menus designed for mobile or when viewing on smaller screens.
Patterns
Patterns are pre-designed sections of content that are available for you to insert into pages and then further edit or customize as you wish. Any patterns from the starter site will be imported to your site, so you can make use of them any time you want.
Terms
Taxonomy terms such as post categories, tags, and also product categories and taxonomies such as product color or size if the site is eCommerce.
There are also some terms that are not visible on the front-end of the site, but are required in the back-end of WordPress. These will be added if they don’t already exist.
Theme and Plugins
If the required theme is not already active, this will be installed (if not already installed) and activated (if not already active) when activating the starter site.
The main theme that is used for our starter sites is the Acai WordPress theme, but occasionally we may use a different theme for a particular starter site.
Any plugins that may be required will also be installed (if not already installed) and activated (if not already active) when activating the starter site. Examples of required plugins could be WooCommerce if the site is an eCommerce starter site, or plugins for such things as contact forms or maps.
Some of the WordPress plugins we have tested and make use of in our Starter Sites:
WooCommerce – the #1 eCommerce plugin for WordPress.
Block Visibility – a very handy and powerful plugin that allows for displaying content under a wide range of conditions such as screen size, logged-in or looged-out and much more.
Gutena Forms – a powerful, highly cutomizable, yet lightweight form plugin that loows you to create contact, enquiry and booking forms.
WP Map Block – display interactive location maps from Google Maps or OpenStreet Maps.
Carousel Slider Block – a responsive carousel slider that supports adding any blocks to slides.
Social Sharing Block – add social share icons from the most popular social channels to your website.
Need help with Starter Sites?
We welcome your support questions.
Please ask us and we will do our best to help you with any queries regarding this plugin.